Hey, it’s Lisa Williams, Your Moxie Maven! Today, I’m pumped to show you the vital steps for web designers looking to set up their Moxie CRM.
If run a small web design business, like my husband and I, this guide will lay out the foundation for your success. Trust me, once you have these pieces in place, life will be much easier for you.
Getting Started: Setting Up Your Business Preferences
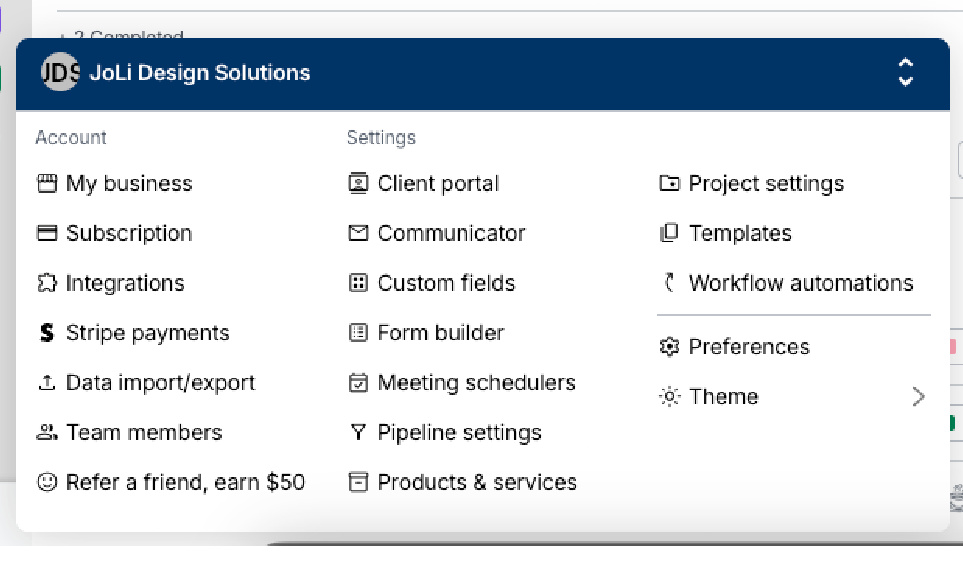
First things first, we need to get those business preferences and settings ironed out. You’ll want to go to your Workspace Settings and acess the “My Business”, “Communicator”, “Integrations” and “Preferences” to start. I have a YouTube tutorial on this as well.
It’s all about laying a sturdy foundation, so here’s what you’ll want to do:
- Custom Fonts: Upload any custom fonts that your business frequently uses. This will ensure brand consistency across all your communications.
- Invoice Templates: Check your default invoice email templates. Although blank initially, set these up after you’ve created your essential email templates.
- Business Information: Ensure all your business details are up-to-date. Moxie CRM lets you customize various fields to meet your needs, making information management a breeze.
It might feel like a chore, but these small settings are essential for smooth operations down the line.

Mastering Email Templates: The Heart of Your CRM
Now, let’s dive into setting up your email templates, because as web designers, you’ll rely on these heavily. It’s crucial to get this right up front to save you headaches later. Here’s a quick breakdown:
- Navigate to Templates Section: After handling your basic settings, head over to the ‘Templates’ section.
- Import From the Template Library: Search through a ton of templates specific to web designers. You’ll find project kickoff emails, cold pitches, and even response templates for hourly rate inquiries.
- Customize Using Tokens: Modify these templates using tokens like ‘Opportunity First Name’ or ‘Client First Name’ to personalize your communications.
- Organize by Category: Create folders such as ‘Invoicing’, ‘Inquiry’, and ‘Design Projects’. This will keep your templates organized and easily accessible.
- Set Up Essential Emails: Start with essential ones like proposal sending, project kickoff, and invoice notifications.
Top 5 Email Templates Web Designers Need
1. Project Kickoff Email Template:
Kick start your new projects on a high note with a warm and professional welcome email that sets the right expectations from day one.
2. Proposal Sending Email Template:
Send custom agreement emails that help you win over your prospective clients faster. There are tokens in Moxie CRM that you can use to personalize this email.
3. Inquiry Follow-Up Email Template:
Never let a potential lead slip through the cracks. Use a follow-up email to ensure timely follow-ups and convert inquiries into clients. This email can be automatically sent via a form submission. In the form settings you will choose an email confirmation to send and a pipeline stage to add the inquiry to.
4. Invoice Email Templates:
I would set these emails up first and then plug them into your email templates for invoices in your Preferences.
5. Project Completion Email Template:
Finish strong by wrapping up projects with a grateful and detailed email that reflects on the work done and opens doors for future collaborations. This can also include a request for project feedback.
Create and Embed Forms: Capturing Client Details
Forms are a linchpin for capturing client information and inquiries, especially as a web designer. Here’s how you can make yours work for you:
- Build Inquiry Form: Create a comprehensive web design inquiry form that’s accessible on your website. See my YouTube Tutorial on how I set up and use our web design inquiry form.
- Settings are Key: Make sure to go into the settings of your form to link it with a confirmation email template and add it to your pipeline so that the form submission not only sends the email but also creates a new opportunity.
- Pipeline Stages: Map your form to stages in your pipeline. This segmentation keeps your process organized and manageable. Submitting the form not only initiates the inquiry but also can trigger a string of automated tasks, preparing your workflow for the incoming project. It eliminates manual data entry and errors, giving you an edge in efficiency. Think of it as laying down the edges of a puzzle before getting to the meat of it.

Managing Your Pipeline Like a Pro
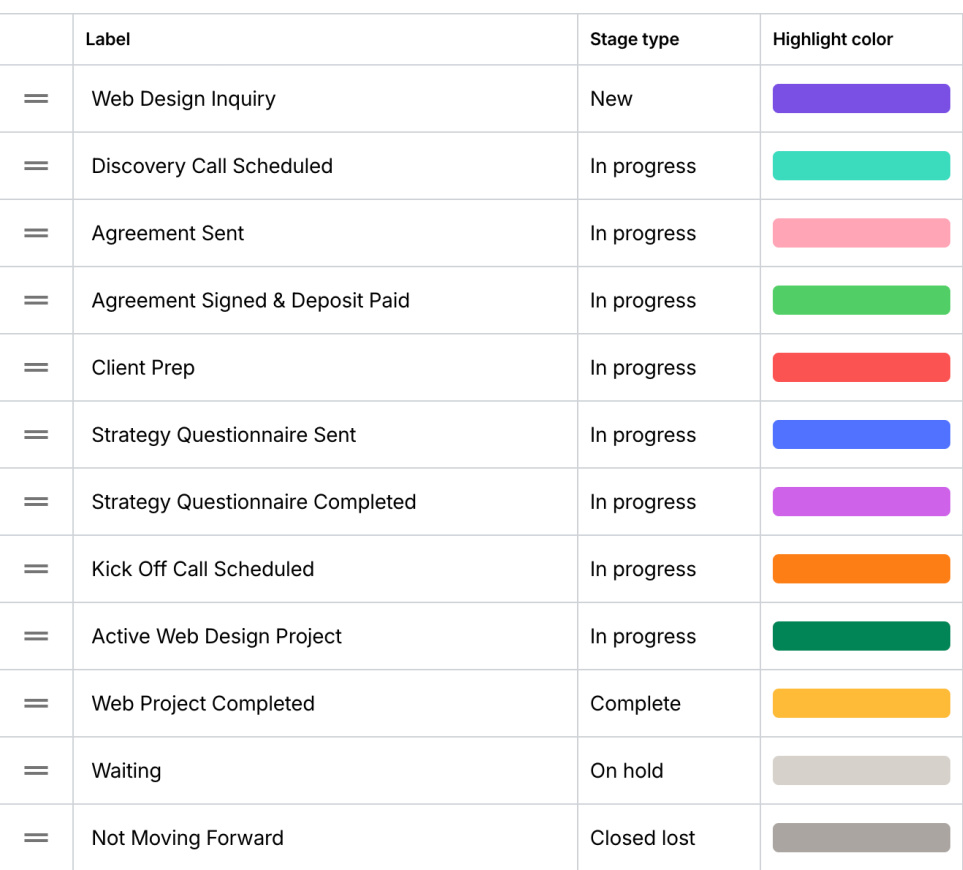
Next, let’s get your pipeline stages set up. This is how you keep track of where each client or potential client is in your process.
Steps to Set Up Pipeline Stages:
- Create Pipeline Stages: Define stages specific to your web design process, such as new inquiries, discovery calls, proposals sent, etc.
- Assign Stage Types: For instance, label the initial inquiry stage as ‘New’.
- Workflow Automation: While advanced, setting this up later can automate tasks based on stage progression. These stages not only help in organizing your workload but also ensure that no opportunity falls through the cracks. You’ll always know exactly where each project stands and what needs to be addressed next.
Utilizing Templates for Seamless Agreements
Finally, we move on to setting up agreement templates. This is what will turn your inquiries and proposals into official projects.
- Create Agreement Templates: Pre-set as much information as possible in your templates, such as payment plans, project scopes, and terms and conditions.
- Customizing for Clients: Once an inquiry turns into a viable project, tweak your template to suit the specifics of that client.
- Efficiency in Contract Creation: With a robust template, you save time and ensure consistency in your agreements. Having these templates in place allows you to move swiftly from verbal agreements to written ones. The faster you can send out a professional, well-crafted agreement, the sooner you can start working on that exciting new project.
Final Thoughts
Setting up your Moxie CRM isn’t just about inputting information. It’s about laying a strategic foundation that streamlines your communication, captures essential client info, and organizes your workflow to boost efficiency and productivity.
Remember, the effort you put in now will pay dividends as your business grows, helping you stay organized and on top of every opportunity.


