As businesses continue to evolve in the digital age, having the right Customer Relationship Management (CRM) system becomes crucial. Moxie CRM has emerged as a powerful solution for small businesses, offering robust features and customization options. This guide will walk you through the first six essential steps to set up your Moxie CRM effectively.
Essential 6-Step Setup of Moxie CRM
Before you dive into customizing Moxie CRM, let’s get you set up for success! I’ll walk through six key areas that will create a rock-solid foundation for your CRM. Think of these as the building blocks that will help your system run smoothly while you make it uniquely yours. Trust me, taking care of these basics first will make your Moxie experience so much better!
The 6 Essential Areas in Moxie CRM That You Set Up First
- Essential business settings
- Email template creation
- Pipeline stage setup
- Form template configuration
- Project types and client notifications
- Project templates
Navigating the Moxie Platform Interface
In the voice of Monica Gellar – I am a “Friends” addict you know! hahaha
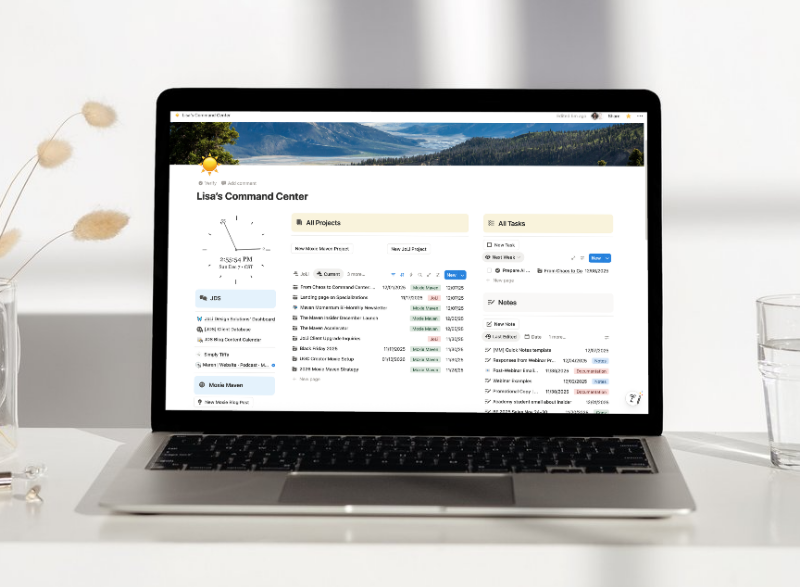
Let me tell you about the Moxie CRM interface – it’s literally the most organized and efficient thing since my label maker! I’m so excited to show you how perfectly arranged everything is.
As someone who knows the importance of having everything in its proper place (I mean, have you seen my apartment?), I can tell you that Moxie’s interface is absolutely spotless when it comes to organization and workflow management.
- Left Navigation Menu: Pinnable shortcuts and access to all features
- Focus Screen: Your home base for daily operations
- Quick Links: Customizable shortcuts to frequently accessed areas
- Full Search Feature: Comprehensive search across all platform elements
- Dashboard: Overview of tasks and activities
Essential Settings Configuration
Let’s get your workspace set up for success! Taking a few minutes to configure your settings will help you make the most of Moxie’s amazing features. Think of it as setting up your virtual office – when everything’s in its perfect place, your daily work becomes smoother and more enjoyable. Plus, you’ll be able to tap into all the cool tools Moxie has to offer!
Business Settings
- Basic business information setup
- Data import options from other platforms
- Integration configuration (calendar, Zoom, payment providers)
- Accounting software connections
- Mailbox setup and verification
- Email signature configuration
- Custom email settings
Preferences Setup
- Custom font uploads
- Theme selection (bold, minimalist, dark mode)
- Client portal access settings
- Default rates and late fee configuration
- Invoice settings
Email Template Creation
An integral part of Moxie CRM – the email system! It’s like having your own personal communication command center that makes connecting with clients and team members an absolute breeze. When you set up your mailbox and custom email settings, you will have a fully integrated inbox!
Whether you’re sending quick updates, detailed proposals, or friendly check-ins, Moxie’s email features ensure everything looks polished and stays consistent with your brand.
Plus, with all the customization options available, you’ll feel like you have your very own virtual assistant helping you stay on top of client communications!
Focus on essential templates like new invoice, payment confirmation, and past due notifications. Customize these to include your brand’s voice and personality.
Choose Template Type
- Select either a Blank Template or search the Template Library for Moxie Essential Emails.
- Import the relevant templates as needed.
Start by creating the following four invoicing email templates then move on to other templates
- New Standard Invoice
- New Invoice
- Outstanding Payment
- Payment Confirmation
Customize Templates
- Edit the subject line and body of the email to fit your business needs.
- Add your business logo and any necessary headers.
- Utilize tokens for dynamic content (e.g., invoice number, amount due) by selecting them from the token list on the right side.
Form Creation and Management
Let’s talk about the fun and creative side of form-building! Think of it as putting together the perfect recipe – you want just the right mix of ingredients to make something amazing. While forms might seem like simple questionnaires, they’re actually your secret weapon for connecting with users and gathering valuable insights.
It’s like having a friendly conversation with your users, where every question helps you understand them better. The magic happens when you thoughtfully design each part of your form to create an experience that’s as smooth as butter.
A single inquiry form on your website for different services (web design, SEO, photography) is a game-changer.
- Automate processes based on user selections in the forms. This reduces the need for manual sorting and ensures your clients quickly get the information they need.
- Start with general categories before diving into service-specific details.
The Moxie Maven Masterclass
Managing Projects with Templates
Project templates serve as the essential foundation for efficient and effective project management in any business environment. These carefully crafted frameworks act as comprehensive guides that not only define the fundamental structure of your projects but also establish the rhythm, pacing, and systematic organization of your work processes.
Benefits of Using Project Templates:
- Customization: Adjust timelines and due dates based on each client’s needs.
- Consistency: Ensure every project follows the same high standards.
- Efficiency: Save time by eliminating the need to start from scratch for every new project.
Example: Branding and Web Design Projects
Let’s take a typical branding and web design project. This type of project usually spans six phases that can be completed within a day (VIP day) or stretch over six weeks. These phases include:
- Initial Consultation
- Concept Development
- Design Mockup
- Final Revisions
- Implementation
- Launch and Review
Each phase can have specific tasks and subtasks with due dates and assigned personnel. Project templates and tokens can help you manage these phases seamlessly—automating client notifications and keeping everyone on the same page.
Setting Up Project Types and Task Management
Managing client projects effectively requires a well-organized system for tracking tasks and client interactions. Here’s a comprehensive guide to setting up project types and managing task statuses efficiently.
Understanding Project Types
Project types serve as templates for organizing your work and client interactions. The system comes with a default project type, but you can create custom ones based on your needs.
Key Components of Task Statuses – totally customizable!
- Not Started
- In Progress
- Client Tasks (requiring client action)
- Completed
Client Interaction Features
When setting up client-related tasks, there are two important types:
- Client Approval: Items requiring client review and approval before proceeding with the project
- Client Tasks: Actions that clients need to complete, such as providing content, images, or testimonials
Best Practices for Project Setup
- Consider these tips when setting up your project types:
- Customize email templates to match your brand and communication style
- Keep task statuses simple and relevant to your workflow
- Place completed status at the end of your status list
- Use the default project type for simple projects that don’t require complex client interaction
Project Templates – The Tip of The Iceberg To Customizing Moxie CRM
In the voice of Rachel Green – my favorite “Friend”. 😁
Let me tell you about these amazing project templates! They’re like, totally the best thing since fat-free frozen yogurt for running your business. I mean, could they BE any more helpful? hair flip
So basically, these templates are like having your own personal Monica organizing everything – they keep all your work super neat and consistent. And the best part? They do all the boring stuff for you automatically! Like, who has time for repetitive tasks when there’s shopping to do?
I’m telling you, once you set these babies up, they’re gonna change your business life forever. It’s like that time I reorganized Ralph Lauren’s entire stockroom, but way easier! Now come on, let me show you how to make these templates work for you!
Getting Started with Project Templates
When setting up project templates, you have numerous options to customize and automate your workflow. These templates can be activated in multiple ways:
- Manually
- Through signed agreements
- Via integrated payments
- Through workflow automation
Project Collaboration Settings
- Full project collaboration – clients can edit and make changes
- Read-only collaboration
- Option to show only assigned tasks to clients
Pricing Structure
- Fixed price
- Hourly rate
- Recurring payments
- Per-item pricing
Task Management
- Main tasks can have multiple subtasks
- Tasks can be assigned to specific team members
- Due dates can be set relative to project start
- Status tracking helps monitor progress
Client Communication
- Automatic notifications when tasks are assigned
- Email alerts for required actions
- Client portal access for project tracking
By properly setting up your project templates, you can create a streamlined workflow that requires minimal adjustments for each new client, saving time and ensuring consistency across your projects.
Best Practices and Tips For Moxie CRM Beginners
To ensure you get the maximum benefit from your Moxie CRM implementation and create a solid foundation for your business operations I encourage you to take it slow in the beginning, making sure you have all your ducks in a row before you jump into invoicing, agreements and workflows.
- Start with essential invoice templates before creating other email templates
- Utilize the template library for quick setup
- Customize default templates to match your brand voice
- Configure all integrations early in the setup process
- Take advantage of the quick links feature for efficient navigation
Conclusion
Getting started with Moxie CRM is super exciting, and I want to make sure you’re set up for success right from day one. And guess what? While these steps are your starting point (think of them as your CRM springboard!), they’re just the beginning of your Moxie journey. As you get more comfortable with all the cool features, you’ll discover even more ways to make Moxie work perfectly for your unique business needs. How exciting is that?
🎯 Get 30 days free of Moxie CRM here


